Add a User to Syniti Knowledge Platform
You can add a user to Syniti Knowledge Platform and assign permissions.
You can grant a combination of the following permissions to a user depending on the access required.
- ADMIN - Can add and edit user accounts and set user permissions to Platform components.
- APPROVER - Can be set as an Owner for elements and can approve elements in order to publish them.
- AUTHOR - Can create child elements - Processes, Scenarios, Roles, Tasks, and assets such as Terms, Rules, etc.
- USER - Read-only access. This type of user can add comments, share a URL and view change history for an asset, but cannot sponsor an asset or otherwise edit it.
NOTE: If a user has User permission for a component, that component does not display in the Quick Add list because the user cannot add the asset. Additionally, guidance related to adding or editing assets does not display for a user with User permission.
NOTE: To access Syniti Knowledge Platform, all users must have User permission for all Syniti Knowledge Platform components, and this permission cannot be removed. It is granted by default to all users.
NOTE: If multiple permissions are assigned to a user, the level with the broadest permission is used. For example, if a user is assigned as both a User and an Approver, Syniti Knowledge Platform grants the user Approver access.
NOTE: If a user does not have permission to add an asset, it displays dimmed with a lock icon on the Quick Add menu.
Permission can be granted to these components:
- Data Catalog — Controls access to Systems and Data Sets.
- Glossary — Controls access to terms.
- Strategy — Controls access to Visions, Missions, Goals and Initiatives.
- Platform — Controls access to Syniti Knowledge Platform. Admin permission at the Platform level is required to add users to Syniti Knowledge Platform.
- Process Designer — This feature is not used.
- Policy — Controls access to policies.
Users can change certain settings for their own accounts from their profile. Refer to Update My Profile for more information.
To add a user:
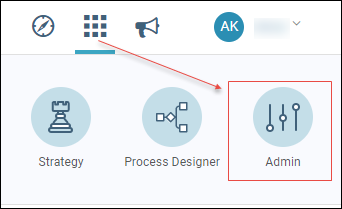
- Click the Applications icon.
-
Click the Administration icon in the options panel.
-
Click Add New to create a user account.
NOTE: This opens a detail modal where you can create an account for a new user and grant the user access to Syniti Knowledge Platform.
- Enter First Name.
- Enter Last Name.
-
Enter Email.
NOTE: A valid email address is required.
-
Enter Locale.
NOTE: Or, leave en (English) as the default. The Locale sets the date format for Syniti Knowledge Platform.
-
Select Persona.
NOTE: Persona controls who has access to the Dashboard page. Values are:
- Director – The Director persona has access to the Director Dashboard. Refer to Director Dashboard for more information.
- Default – Default persona for Syniti Knowledge Platform with no access to the Dashboard.
- Migration – The Director persona has access to the Migration Dashboard. Refer to Migration Dashboard for more information.
-
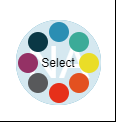
Click the Badge icon to change badge color (optional).
-
Click Custom Permissions.
NOTE: The Custom Permissions tab is where you grant the user permissions to the different components within Syniti Knowledge Platform.
-
Click the checkboxes to assign Permissions by component.
- Click Save.
An email is sent to the user's email address with details about logging in and setting a password.
Was this article helpful?
Sorry about that.
Why wasn't this helpful? (check all that apply)
Thanks for your feedback.
Want to tell us more?
Send an email to our authors to leave your feedback.
Great!
Thanks for your feedback.